
- All
- Product Name
- Product Keyword
- Product Model
- Product Summary
- Product Description
- Multi Field Search


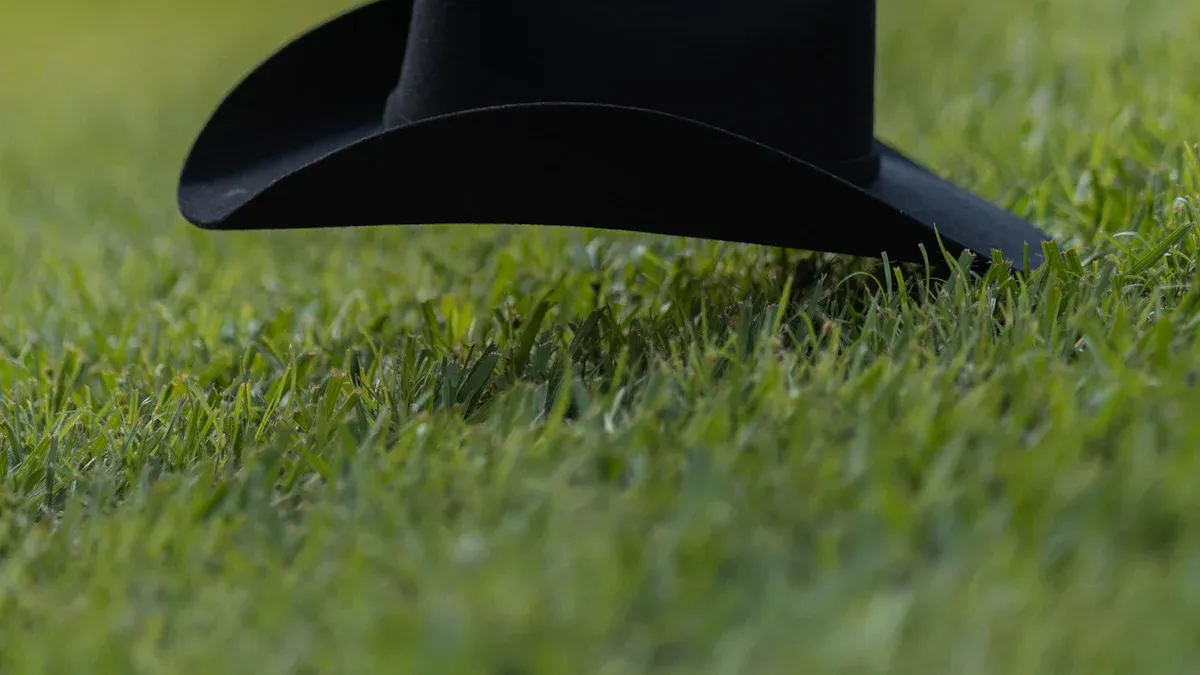 You might think fixing your favorite hat sounds tricky, but you can steam a hat at home with ease. Grab a few simple tools, and you will see how quickly your hat bounces back into shape. Whether you love felt, straw, or a classic cap, this method helps every type look fresh again. Give it a try—even if you have never done it before, you will love the results!
Use a real steamer like a Jiffy Steamer or a kettle. This will make soft, steady steam for the best results.
Get your workspace ready with a flat surface. Be careful and do not touch the hot steam.
Different hat materials need special care. Spray felt hats with a little mist. Keep straw hats dry. Take off stickers from caps before you steam them.
Hold your hat 6 to 8 inches from the steam. Move it slowly and turn it around. Shape it gently while it is still warm. This helps bring back its shape.
Let your hat dry in the air on a form or ball. This keeps its shape. Brush or clean your hat often to keep it looking nice.
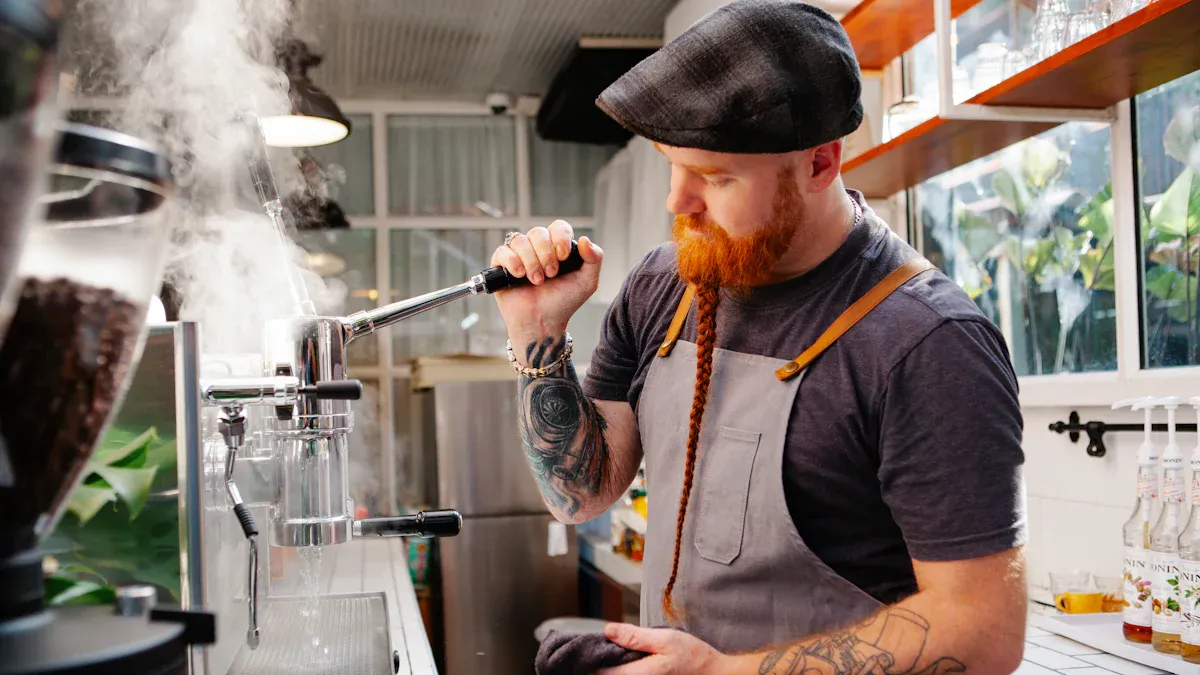
When you want to steam a hat at home, you have a few choices for creating steam. The best tool, according to hat care experts, is a Jiffy Steamer. These steamers come in different models, like the J-1 Hat Steamer, Home, Professional, and even Travel Steamers. Jiffy Steamers make purified steam with just the right amount of moisture. This helps you get rid of wrinkles, packing marks, and other little flaws in your hat. Many people love these steamers because they are made in the USA, built to last, and even come with a three-year warranty.
If you do not have a Jiffy Steamer, you can use other methods to make steam at home. Here are some common options:
Tea kettle on the stove
Pot of boiling water
Hot shower (for a quick steam in a pinch)
Tip: Jiffy Steamers work better than kettles or pots because they give you steady, gentle steam. Kettles can be tricky and sometimes make too much or too little steam.
You might want a few extra items to make the job easier and safer. These supplies help you shape your hat and keep it looking great:
Spray bottle (for lightly misting felt hats)
Clean washcloth
Hat brush (to remove dust and lint)
Masking tape (for picking up fuzz)
Ball, mannequin head, or hat form (for shaping and drying)
Safety Note: Steam gets very hot! Wear heat-resistant gloves if you need to hold your hat close to the steam. Always keep your hands and face away from the direct steam to avoid burns.
With these tools and supplies, you are ready to start steaming your hat safely and easily.
Before you start steaming your hat, you need a safe and comfortable spot to work. Pick a flat surface like a kitchen counter or sturdy table. Make sure you have enough space to move your hands and your hat around. Place a towel or heat-resistant mat on the surface. This protects your table from any drips or heat.
Keep your steamer, kettle, or pot close by, but never put it right on the edge. You want to avoid spills. Plug in your steamer or set your kettle on the stove, but don’t turn it on just yet.
Tip: Open a window or turn on a fan if your space feels stuffy. Good airflow helps keep things comfortable.
If you have pets or small children, ask them to leave the room. Steam can burn skin very quickly. Always keep your workspace clear of anything that might get in the way.
Now, let’s get your hat ready for steaming. First, check the material. Felt, straw, and cotton hats all need a little different care.
Felt hats: Lightly mist the outside with a spray bottle. This helps the steam work better. Don’t soak the hat—just a gentle spritz.
Straw hats: Wipe off any dust with a clean, dry cloth. Straw doesn’t need misting, but it does need to stay dry.
Caps (like baseball hats): Remove any stickers or tags. Use a lint roller or masking tape to pick up fuzz or hair.
If your hat has a lot of dust, use a hat brush to sweep it away. Always brush in the same direction as the fibers.
Safety Reminder: Hot steam can damage some surfaces. Place a towel under your hat to catch any drips. Never leave your steaming tool unattended.
Once your workspace and hat are ready, you can move on to the fun part—steaming and shaping your hat!
Ready to bring your hat back to life? Let’s get started. You want to steam a hat the right way, so follow these steps for the best results:
Fill your steamer or kettle with water and turn it on. Wait until you see a steady stream of steam.
Hold your hat about 6 to 8 inches above the steam source. This distance keeps your hands safe and protects the hat from too much heat.
Slowly rotate your hat. Move it back and forth so every part gets an even amount of steam. You want the material to feel warm and soft, not wet.
Keep steaming for a few minutes. The time depends on your hat’s size and material. For most hats, a few minutes is enough. If you use a hot shower, let the hat sit in the steam for 10 to 15 minutes.
Don’t rush. If you bring the hat too close to the steam, you might damage it. Stay patient and let the steam do the work.
Tip: If you notice the hat getting too hot or damp, pull it away from the steam for a moment. You can always go back for more if needed.
Once your hat feels soft and flexible, it’s time to shape the hat. This part lets you fix dents, smooth out wrinkles, or even reshape a hat that lost its form.
Use your hands and fingers to gently press and mold the hat. For felt hats, knead the brim or crown until you see the shape you want.
If you have a hat form, mannequin head, or even a ball, place your hat on it. This helps keep the shape while the hat cools and dries.
For brims, pinch and roll the edges between your fingers. You can curve the brim up or down, depending on your style.
For the crown, use your thumbs to push out dents or smooth bumps.
Note: Don’t overwork the hat. If you keep pressing or pulling while it’s too hot, you might stretch or warp the material.
To check if your hat is ready, touch the surface. It should feel warm and slightly damp, but not soggy. If the hat cools and holds its new shape, you did it right! If not, you can repeat the process, but always let the hat rest between rounds of steaming.
When you steam a hat and shape it with care, you give it a fresh look and a perfect fit. You can reshape a hat that’s been squished in a suitcase or lost its style over time. Just remember to go slow, use gentle hands, and enjoy the process.
Every hat material needs a little special care. You want your hat to look great for as long as possible, so here are some quick tips for each type:
Felt hats: After steaming, always brush your felt hat with a soft hat brush. Brush in the same direction as the fibers. This keeps dust and lint away. If your felt hat gets wet, let it air dry. Never use a hair dryer or put it near a heater.
Straw hats: Straw hats like gentle handling. Wipe them with a dry cloth after steaming. Avoid getting them too wet. If you see any cracks, stop steaming and let the hat rest. Straw can get brittle if you use too much steam.
Fitted caps (like baseball hats): Use a lint roller or masking tape to pick up fuzz. If your cap loses shape, steam it lightly and reshape the brim with your hands. Always remove stickers before steaming.
Tip: Always check the care label inside your hat. Some hats have special instructions from the maker.
You want your hat to keep its new shape after steaming. Here’s how you can set it right:
Place your hat on a ball, mannequin head, or even your own head. This helps the hat hold its shape as it dries.
Let the hat air dry in a cool, dry place. Avoid direct sunlight, which can fade colors or shrink the material.
Don’t rush the drying process. Give your hat plenty of time to set—usually a few hours.
For ongoing care, brush your hat regularly to keep it clean. Store your hat on a shelf or in a box to protect it from dust and squishing. If your hat starts to lose shape again, a quick steam will bring it back to life.
Remember: A little care goes a long way. Your hat will look sharp and last much longer with these easy steps!
If your straw hat looks a little tired or out of shape, you can fix it at home. You just need some steam and a gentle touch. Here’s how to reshape a straw hat without stress. First, fill a kettle or pot with water and bring it to a boil. When you see steady steam, hold your hat about 8 inches above the steam. Move the hat slowly so the steam touches every part that needs reshaping. You want the straw to feel warm and flexible, not wet.
Tip: Never soak your straw hat in water. Too much moisture can make the straw weak or cause it to crack.
If you do not have a kettle, you can use a garment steamer. Some people even use the steam from a hot shower, but a kettle gives you more control. Remember, the goal is to steam a straw hat just enough to make it soft for shaping.
Once the straw feels soft, you can start to reshape a straw hat with your hands. Gently press out dents or smooth the brim. If you want a certain curve, use your fingers to pinch and roll the edges. For a round crown, place the hat on a ball or your head while it cools. This helps the hat keep its new shape.
Let the hat air dry in a cool, shaded spot. Do not use a hair dryer or put it in the sun. Sunlight can make the straw brittle. Give your hat plenty of time to dry fully before wearing it again.
Common Mistakes to Avoid:
Over-steaming can make the straw soggy.
Bending the hat too much can cause cracks.
Rushing the drying process may ruin the shape.
If you follow these steps, you will know exactly how to reshape a straw hat at home. With a little patience, you can reshape a straw hat and keep it looking great all season.
Even if you follow every step, you might run into a few bumps along the way. Don’t worry—these mistakes happen to everyone! Here are some of the most common issues you might see when steaming a hat:
Over-steaming: You hold your hat over the steam for too long. The material feels soggy or limp.
Misshaping: The hat loses its original shape or gets new dents and bends.
Water spots: You notice small stains or marks, especially on felt hats.
Cracked straw: Straw hats can crack if you bend them too much or use too much steam.
Uneven brim: The brim looks wavy or crooked after shaping.
Tip: Always check your hat as you steam. If you spot a problem early, you can fix it before it gets worse.
You can fix most hat problems at home with a little patience. Here’s what you can do for each issue:
For water spots on felt hats, use a soft-bristle brush with warm water and mild soap. Gently brush the stained area, then blot with a clean, damp cloth. Let the hat air dry.
If your hat is misshaped, steam it again to soften the material. Place it on a hat form, a round container, or even your head. Mold it gently back into shape. Let it dry completely before wearing.
When you over-steam a hat and it feels too soft, stop steaming right away. Let the hat cool and dry. If it still looks wrong, try reshaping it once more. If the problem stays, you might need a professional’s help.
For cracked straw, avoid more steam. Use a DIY repair kit for small cracks. If the damage is big, a hat specialist can patch or reblock the hat.
If the brim is uneven, steam just the brim and use your fingers to smooth it out. Place the hat on a flat surface to set the shape as it dries.
Note: If your hat has heavy stains, deep cracks, or major misshaping, a professional restoration service can help. They can clean, reblock, or repair hats that need extra care. When your hat means a lot to you, or if DIY fixes don’t work, trust an expert to bring it back to life.
You now know how to steam a hat at home. Just gather your tools, prep your workspace, and follow each step. You can shape your hat and make it look new again. Give it a try and see the difference for yourself! Regular care keeps your favorite hats looking sharp and ready for any adventure.
Hats last longer when you show them a little love.
You only need to steam your hat when it looks wrinkled or loses its shape. Most hats stay fresh for months with regular care. If you wear your hat a lot, check it every few weeks.
Yes, you can steam hats with decorations or patches. Just keep the steam away from glue or delicate parts. Hold the hat so the steam touches only the fabric you want to reshape.
If your hat smells musty, let it air out in a cool, dry place. You can sprinkle a little baking soda inside the hat and shake it out after a few hours. That helps remove odors.
Always test a small hidden spot first. Some vintage or delicate hats need extra care. If you feel unsure, ask a professional before steaming. You want to protect your special hat!


